YouTube has revolutionized the way we consume and share videos, making video editing an essential skill for content creators.
As YouTube has become one of the most popular platforms for sharing videos, mastering the art of video editing is essential for creating compelling and engaging content.
Whether you're a beginner or an experienced YouTuber, understanding the best practices and techniques can take your videos to the next level.
In this article, we will explore various aspects of YouTube video editing, providing valuable insights to help you create compelling and engaging content that stands out from the crowd.
Let's dive in and discover how you can enhance your video editing skills for YouTube success.
Here is what you will read in this article:
To create visually appealing and impactful videos, it's crucial to adopt the following best practices and techniques:
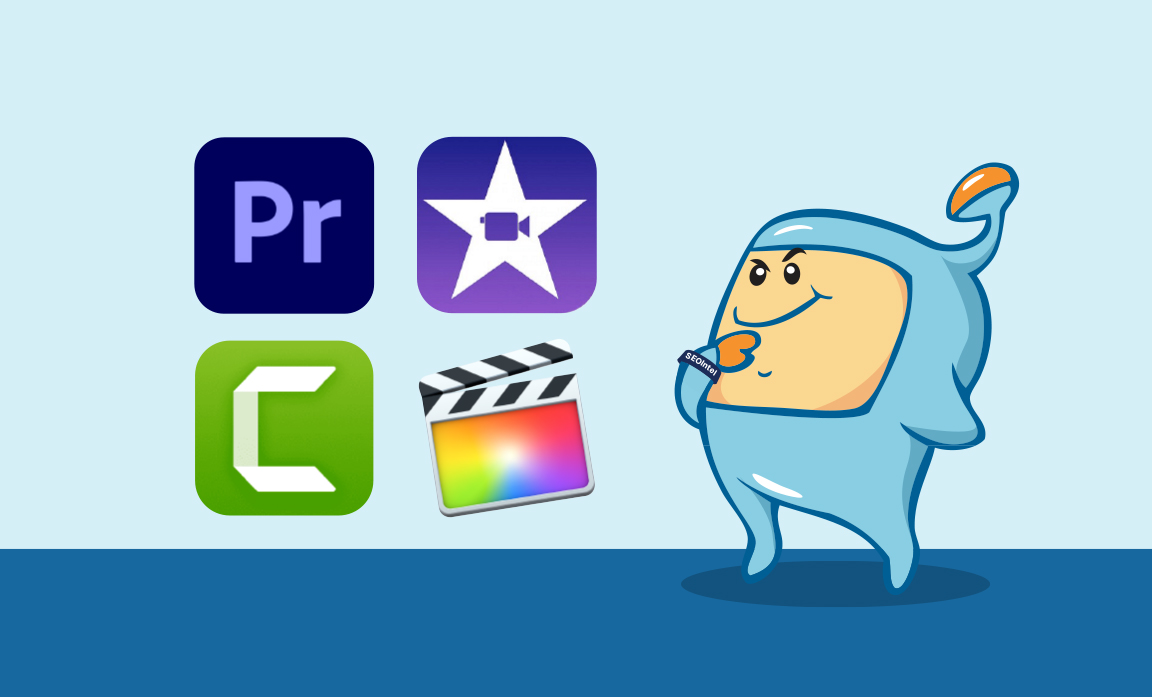
When it comes to YouTube video editing, one of the crucial decisions you'll make is choosing the right software for your needs.
The software you select will greatly impact your editing experience, the features available to you, and the overall quality of your videos.
Here are some popular options to consider:
Widely regarded as the industry standard, Adobe Premiere is a powerful and comprehensive video editing software.
It offers a combination of robust features and an intuitive user interface, making it a favorite among professional YouTubers.
With Adobe Premiere, you have access to advanced editing tools, effects, transitions, and seamless integration with other Adobe Creative Cloud applications.
Its flexibility and scalability make it suitable for both beginners and advanced users who seek sophisticated editing capabilities.
If you're a Mac user, iMovie comes as a built-in editing software that offers simplicity and ease of use.
It provides a user-friendly interface with drag-and-drop functionality, making it an excellent choice for beginners or those looking for a straightforward editing experience.
While iMovie may not have as many advanced features as Adobe Premiere, it still offers essential editing tools, effects, and transitions to create impressive videos with relative ease.
Considered a professional-grade editing software, Final Cut Pro is commonly used by TV and movie studios.
It provides extensive editing capabilities and advanced features for those who require more control over their editing process.
While Final Cut Pro has a steeper learning curve compared to iMovie or Adobe Premiere, it offers unparalleled precision and flexibility.
Its robust toolset, including advanced color grading, multicam editing, and powerful effects, makes it a popular choice among professional video editors and YouTubers who demand the highest quality in their work.
Camtasia is an ideal choice for creating screencast videos, tutorials, software demonstrations, and educational content that involves screen recording.
It specializes in capturing screen recordings and offers editing features tailored to this specific type of content.
Camtasia provides a user-friendly interface, making it easy to edit, add annotations, and incorporate additional multimedia elements into your videos.
If your content revolves around screen capture, Camtasia provides the necessary tools for a seamless editing experience.
When choosing your editing software, consider factors such as your budget, desired features, and compatibility with your operating system.
Take the time to explore each option and consider experimenting with trial versions or free versions to get a feel for the software's capabilities.
Additionally, seek out online tutorials and communities dedicated to each software to enhance your learning experience and make the most of the available resources.
Remember, the right software should align with your skill level, desired features, and creative vision.
It should empower you to bring your ideas to life and enhance the quality of your YouTube videos, allowing you to create content that stands out and resonates with your audience.
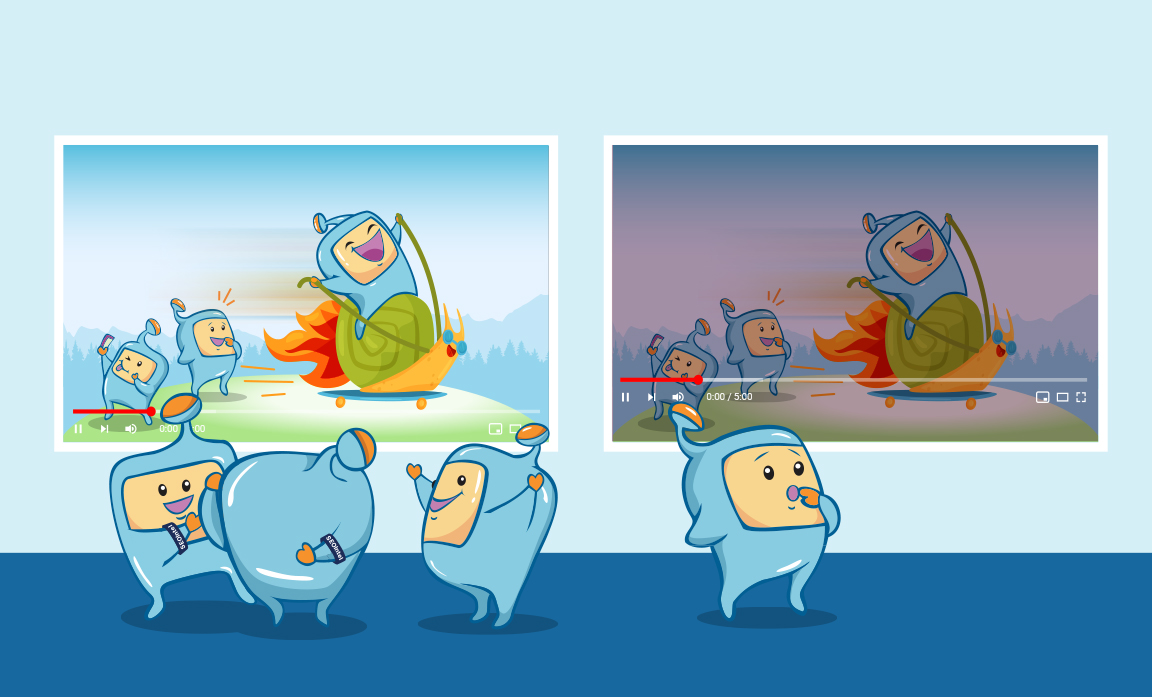
Color correction is a vital aspect of YouTube video editing that can greatly enhance the visual appeal and overall quality of your content.
Even if you shot your video with perfect lighting, applying color correction techniques can take it to the next level and make it more engaging for your viewers.
Color correction involves adjusting the colors, brightness, contrast, and saturation of your footage to achieve a desired look or mood.
One of the primary objectives of color correction is to ensure that your video appears visually appealing and well-balanced.
It allows you to correct any color imbalances or inconsistencies caused by varying lighting conditions, camera settings, or different shooting locations.
By adjusting the color levels, you can make your video visually pleasing and captivating, capturing the attention of your audience.
It can also be used creatively to evoke specific emotions or create a particular atmosphere in your videos.
By manipulating the colors and tones, you can enhance the mood and impact of your content.
For example, increasing the warmth of colors can create a cozy and inviting feel, while desaturating the colors can create a more dramatic or melancholic effect.
Most video editing software provides built-in color correction tools that allow you to make these adjustments easily.
When approaching color correction, it's essential to maintain consistency throughout your video.
This means ensuring that all the clips within a sequence have a unified look and feel.
Consistent color grading helps create a cohesive visual narrative and enhances the overall viewing experience.
To achieve consistency, consider applying color correction adjustments to one clip and then copying those adjustments to other clips within the same sequence.
This way, you can maintain a uniform color palette and avoid jarring transitions between different shots.
Moreover, it's crucial to consider the context and mood of your content when applying color correction.
For example, if you're creating a travel vlog and want to highlight the vibrant colors of a particular destination, you may choose to enhance the saturation and vibrancy.
Conversely, if you're aiming for a more subdued or vintage look, you might opt for desaturated colors and softer tones.
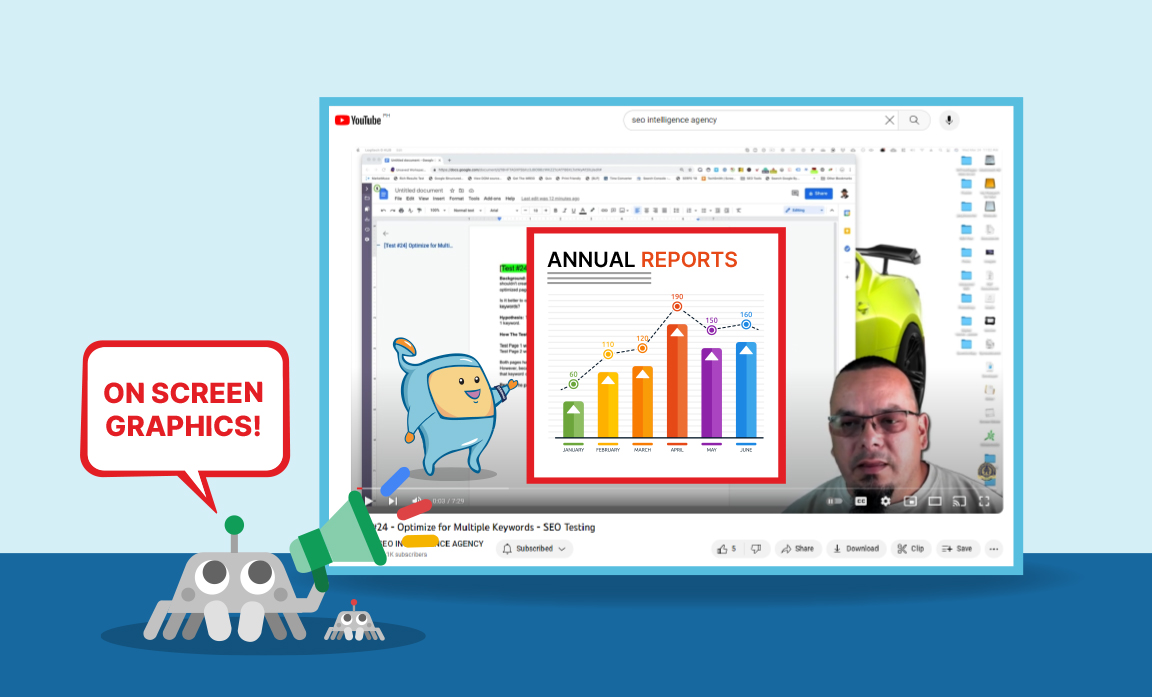
On-screen graphics are a powerful tool in YouTube video editing that can significantly enhance the visual appeal and engagement of your content.
By incorporating on-screen graphics, you can add a layer of visual interest, provide additional information, and emphasize key points in your videos.
On-screen graphics can take various forms, including text annotations, diagrams, progress bars, lower thirds, logos, and animations.
They serve as a visual aid to support your narrative, convey important information, and make complex concepts easier to understand for your audience.
One of the primary benefits of using on-screen graphics is their ability to enhance the storytelling aspect of your videos.
By incorporating visually appealing text, animations, and overlays, you can create a more dynamic and engaging viewing experience.
On-screen graphics can help guide your viewers through the content, provide context, and reinforce the information you're presenting.
For example, you can use text annotations to highlight key points, display statistics or data, or provide additional explanations.
By displaying relevant information on the screen, you can ensure that your viewers grasp the main ideas and retain the information more effectively.
Diagrams and visual representations can also be incredibly helpful in illustrating complex processes or concepts.
They allow you to visually demonstrate step-by-step procedures, workflow diagrams, or any visual element that aids in understanding the topic at hand.
Visualizing information through on-screen graphics can enhance the educational value of your videos and facilitate better knowledge retention.
On-screen graphics can also add a layer of entertainment to your videos.
They can be used to create humorous or engaging visual effects, transitions, or animations that captivate your audience's attention and make your videos stand out.
When utilizing on-screen graphics, it's essential to strike a balance between visual appeal and functionality.
While it's important to make your graphics visually appealing and eye-catching, they should never overshadow the main content or distract from the message you're trying to convey.
They should complement your content and enhance the viewer's understanding without overwhelming or cluttering the screen.
Most video editing software provides tools and features that allow you to easily incorporate on-screen graphics into your videos.
These tools typically include options for adding text, shapes, arrows, icons, and animations.
Experiment with different styles, fonts, colors, and animations to find a design that aligns with your branding and enhances the overall visual appeal of your videos.
It's important to maintain consistency in your on-screen graphics throughout your videos.
This includes using a consistent color scheme, font style, and design elements.
Consistency helps create a cohesive visual identity and reinforces your brand or channel's image.
It's crucial to consider the on-screen graphics timing and placement.
Ensure that the graphics appear at the right moments, complementing the content without obstructing important visuals or distracting the viewer's attention.
Smooth transitions and animations can further enhance the seamless integration of on-screen graphics into your videos.
Remember to use on-screen graphics sparingly and strategically.
Overusing or overcrowding the screen with too many graphics can be overwhelming and diminish their impact.
Choose moments that truly benefit from visual support and consider the purpose and relevance of each graphic element.
By effectively incorporating on-screen graphics in your YouTube videos, you can enhance the visual appeal, engagement, and overall quality of your content.
They serve as powerful tools to guide your viewers, provide additional information, and create an immersive and memorable viewing experience.
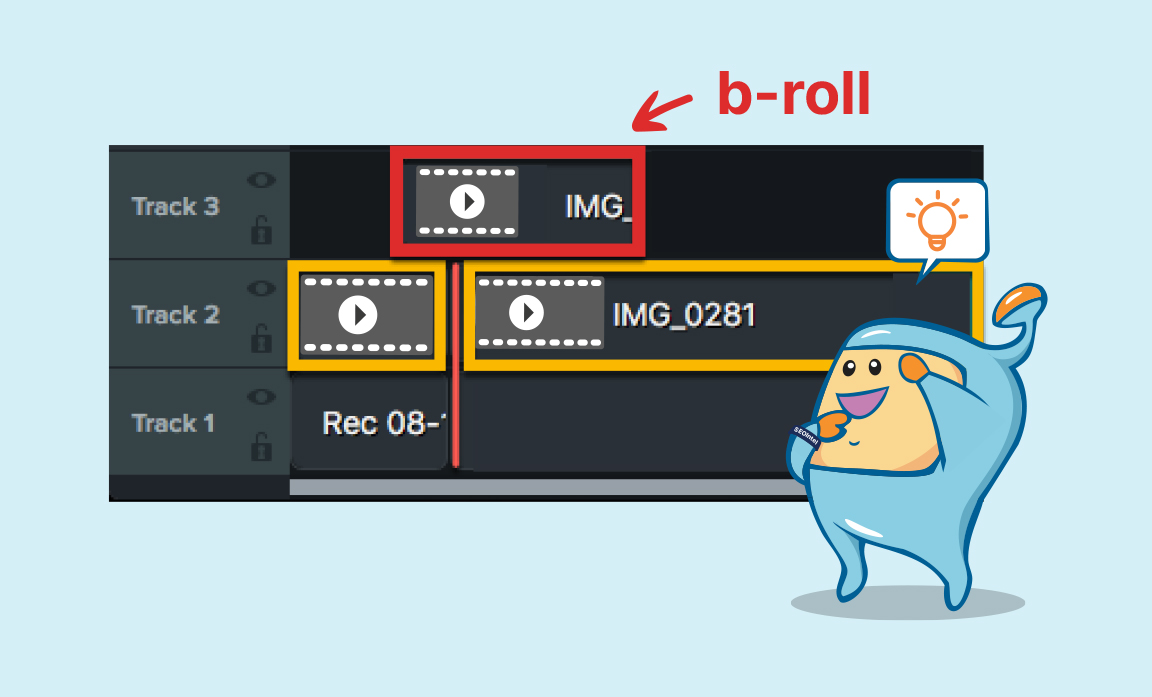
B-Rolls are an essential element of YouTube video editing that can greatly enhance the storytelling and visual appeal of your content.
B-Roll footage refers to additional footage that is not part of the main video narrative but is used to complement and enhance the storytelling.
By incorporating B-Rolls strategically, you can create a more dynamic, engaging, and visually diverse viewing experience for your audience.
They usually appear on-screen while someone is talking, serving as a visual aid to support your narrative, convey important information, and make complex concepts easier to understand for your audience.
One of the primary benefits of using B-Rolls is that they prevent your videos from becoming static and monotonous.
Instead of relying solely on static shots of the main subject, incorporating B-Rolls allows you to introduce variation, show different perspectives, locations, or activities.
This visual diversity keeps your viewers engaged and prevents boredom, increasing their retention and interest in your content.
The use of B-Rolls also helps in hiding mistakes or creating seamless transitions between shots.
Sometimes, there might be moments in your main footage where you may look awkward, make mistakes, or experience technical glitches.
By cutting to B-Roll footage during these moments, you can cover up the flaws and maintain a smooth viewing experience without compromising the overall flow of your video.
B-Rolls provide a buffer to seamlessly transition between shots and maintain a cohesive narrative.
B-Rolls provide an excellent opportunity to educate and demonstrate concepts visually.
While you explain or narrate a particular topic, B-Rolls allow you to visually demonstrate actions, processes, or locations that are relevant to your content.
This combination of explanation and visual demonstration can enhance the educational value of your videos and make complex concepts easier to understand for your viewers.
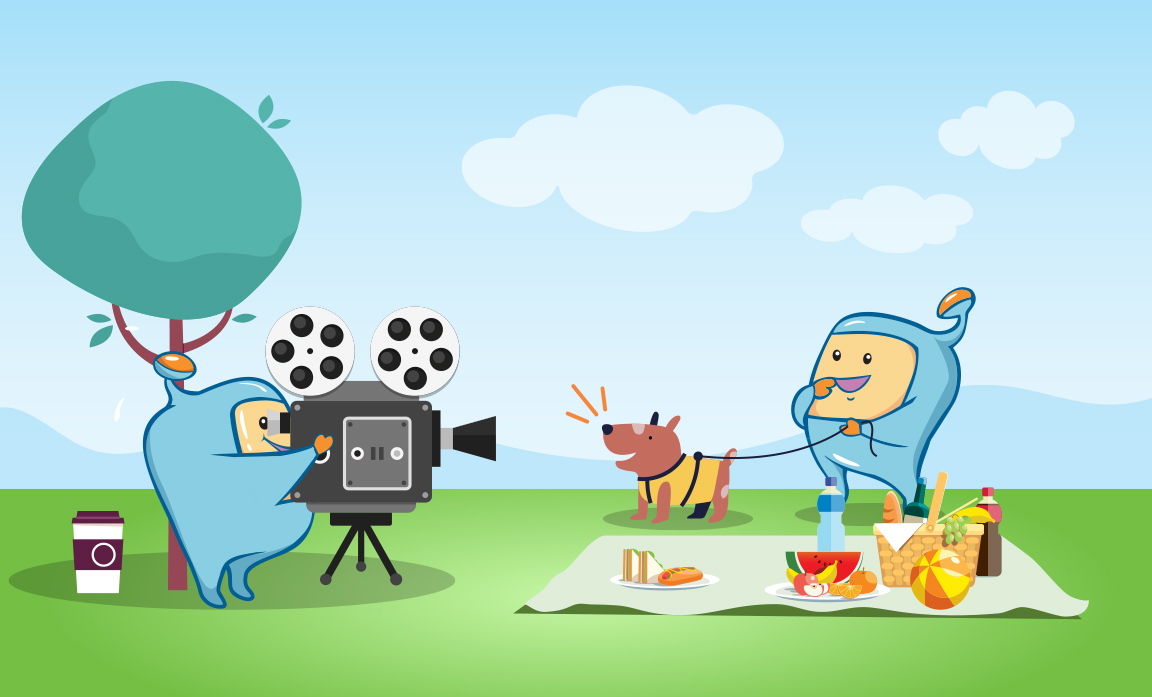
For instance, if you're creating a travel vlog, you can incorporate B-Roll footage of scenic landscapes, bustling markets, or cultural activities to immerse your viewers in the experience and give them a sense of being there with you.
If you're creating a cooking tutorial, you can include B-Roll footage of the ingredients being prepared, the cooking process, or the final dish to provide a visual reference for your instructions.
When using B-Roll footage, it's crucial to ensure that it complements the main narrative and aligns with the overall theme or message of your video.
B-Rolls should enhance the storytelling and reinforce the information you're presenting, rather than being distracting or unrelated.
Each B-Roll shot should have a clear purpose and contribute to the overall impact of your video.
Choosing the right B-Roll footage is essential.
Consider capturing or sourcing high-quality footage that matches the visual style and tone of your main video.
You can shoot B-Roll footage yourself during your filming sessions or utilize stock footage from reputable sources that offer a wide range of footage options.
Make sure that the B-Roll footage aligns with the quality and resolution of your main footage to maintain visual consistency.
During the editing process, strategically insert B-Roll footage at appropriate moments to enhance your storytelling.
B-Rolls can be used to introduce a new section, transition between scenes, emphasize key points, or add visual interest during moments of narration or explanation.
Smooth transitions between the main footage and B-Rolls are crucial to maintain a seamless viewing experience.
Consider the pacing and timing of your B-Roll shots.
Use shorter B-Roll clips to keep the audience engaged and ensure that the shots are visually captivating.
Avoid using excessively long B-Roll shots that might disrupt the flow or distract from the main narrative.
The length and timing of your B-Roll shots should be carefully balanced to enhance the storytelling without overwhelming the viewer.
Incorporating B-Rolls effectively requires a keen eye for storytelling and visual composition.
Consider the framing, angles, and camera movements in your B-Roll shots to create visual interest and capture the essence of the scene.
Variety in camera angles and perspectives can add depth and immersion to your videos, providing a more engaging and visually dynamic experience for your viewers.
Angle changes are a powerful technique in YouTube video editing that can add visual interest, depth, and creativity to your content.
By incorporating angle changes during the post-production editing phase, you can create a dynamic visual experience for your viewers, simulating camera movements and providing a sense of immersion.
The primary purpose of angle changes is to prevent your videos from becoming visually stagnant and monotonous.
When shooting a video, you may capture footage from a fixed perspective or camera angle.
While this can provide a clear view of the subject, it lacks visual variety.
Angle changes allow you to introduce different camera perspectives, providing your audience with fresh viewpoints and a more engaging viewing experience.
With the right footage, you can switch between camera angles in post-production, creating the illusion of camera movement.
This technique adds a sense of dynamism and visual appeal to your videos, keeping your viewers visually stimulated and immersed in the content.
By simulating physical movements such as zooming in or out, panning, or tilting, you can create a more dynamic and visually captivating video.

For example, suppose you have a wide shot that captures the entire scene.
By zooming in during the editing process, you can draw attention to specific details or subjects within the frame.
Conversely, zooming out can provide a broader view or reveal additional elements in the surroundings.
These angle changes create a more visually dynamic experience for your viewers, enhancing their engagement and interest in the content.
Even subtle changes in camera angles can have a significant impact on the overall aesthetics of your videos.
Experimenting with different camera angles and perspectives allows you to find the best ways to present your content and convey your message effectively.
It adds a layer of creativity and visual storytelling to your videos, elevating the quality and impact of your content.
When implementing angle changes, it's essential to ensure a smooth and seamless transition between the shots.
Abrupt or jarring transitions can disrupt the flow of your video and detract from the viewing experience.
To achieve smooth transitions, pay attention to the timing and pacing of your angle changes.
Gradual transitions or utilizing techniques such as crossfades can help create a seamless visual flow.
Consider the pacing and context of your video when deciding where to incorporate angle changes.
For instance, during action sequences or engaging moments, quick angle changes can intensify the viewing experience and create a more dynamic feel.
Alternatively, slower and more deliberate angle changes can be effective in showcasing details, emphasizing emotions, or building suspense.
When editing your videos, use the available tools and features in your editing software to execute angle changes effectively.
Techniques such as keyframing, zooming, panning, and applying transitions can help you achieve smooth and professional-looking angle changes.
Take the time to familiarize yourself with the capabilities of your editing software and experiment with different techniques to find the ones that best suit your video's needs.
Remember to maintain visual coherence and ensure that your angle changes serve the narrative or theme of your video.
Each angle change should have a purpose and contribute to the overall storytelling.
Avoid excessive or unnecessary angle changes that may distract or confuse your viewers.
Instead, focus on using angle changes to enhance the visual impact, engagement, and understanding of your content.
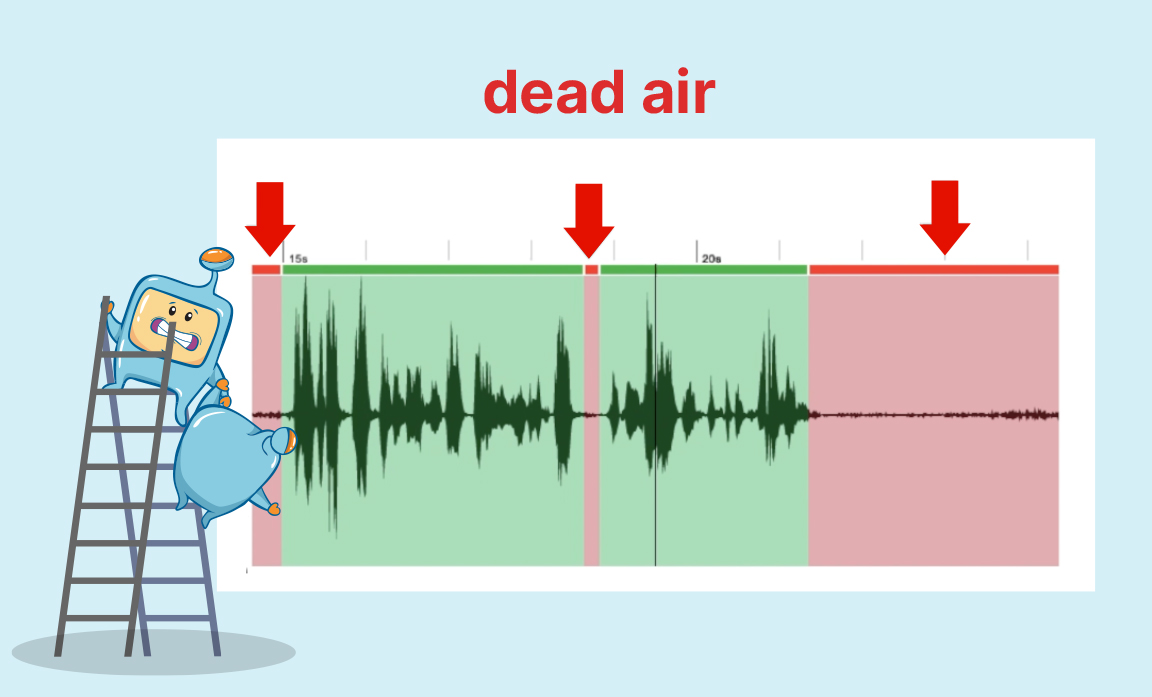
Cutting out "dead air" is a crucial step in YouTube video editing that helps maintain a good pace, flow, and engagement throughout your content.
Dead air refers to moments in your video where there is no action or relevant content, resulting in periods of inactivity or silence.
By removing these unnecessary segments from your raw video footage, you can ensure that your videos remain engaging and hold the attention of your viewers.
One of the main goals of video editing is to deliver concise and impactful content to your audience.
Dead air can disrupt the flow of your video and lead to viewer disinterest or even prompt them to seek alternative content.
To keep your audience engaged, it's crucial to identify and eliminate any sections in your video that lack action, meaningful content, or contribute to the overall message or narrative.
During the editing process, carefully review your video footage and pinpoint moments where there are long pauses, repetitive or redundant information, or segments that do not add value to your video's purpose.
These could include moments where you may have stumbled in your delivery, encountered technical difficulties, or when there is a lull in the conversation.
By removing dead air, you maintain a consistent and engaging pace throughout your video, ensuring that your viewers remain focused and interested in what you have to say or show.
This creates a more enjoyable viewing experience and increases the likelihood of viewers staying engaged until the end of your video.
When editing, be mindful of maintaining a natural and seamless transition between cuts.
Abrupt or choppy edits can disrupt the flow of your video and make it feel disjointed.
Smoothly connecting relevant segments ensures that your video maintains coherence and a logical progression of ideas, even after removing dead air.
To effectively cut out dead air, here are some tips to consider:
Identify pauses, unnecessary repetitions, or sections where the content loses its impact.
Trim the footage precisely to ensure that the cuts are seamless and do not disrupt the flow of the content.
Consider using techniques such as crossfades or audio transitions to create smooth and seamless transitions between the edited segments.
Ensure that the edited video still conveys the intended message and flows logically from one topic or point to another.
Avoid making cuts that result in a rushed or disjointed feeling.
Aim for a balanced pace that allows viewers to digest the information or experience the visual content comfortably.
By eliminating dead air, you create a more concise and impactful video that holds the attention of your viewers.
It allows you to present your content in a clear and engaging manner, enhancing the overall quality and impact of your videos.
Remember, editing is an iterative process, so don't be afraid to experiment, seek feedback, and refine your edits to achieve the desired result.

Adding music to your YouTube videos is a powerful technique that can breathe life into your content, evoke emotions, and enhance the overall impact of your videos.
Music has the ability to create a memorable experience for your viewers, adding energy, atmosphere, and a sense of professionalism to your videos.
When used appropriately, music can greatly enhance the viewing experience, making your videos more engaging and captivating.
Here's why adding music is important:
By carefully selecting the right music, you can influence how viewers perceive and interpret your content.
Whether you want to create an upbeat, exciting atmosphere or a calm and introspective mood, music can help you achieve the desired emotional response from your audience.
It can create anticipation, build tension, or evoke specific emotions that align with the message or theme of your video.
By carefully syncing the music with the visuals and pacing of your video, you can create a more immersive and compelling storytelling experience.
It can make your videos more enjoyable to watch, increasing viewer retention and engagement.
A well-chosen music track can make your content more memorable, leaving a lasting impression on your audience.
Now that we understand the importance of adding music to your videos, here are some tips to effectively incorporate it:
Select music that complements your content and aligns with the mood, tone, and style of your video.
Consider the emotions you want to evoke and the message you want to convey.
Look for royalty-free music libraries or websites that offer a wide variety of music tracks that suit different genres and moods.
Ensure that the volume of the music is appropriately adjusted so that it doesn't overpower your voice or the main audio elements of your video.
Strike a balance between the music and the other audio elements to create a cohesive audio mix.
Most video editing software provides tools to control the volume levels of your music tracks.
Instead of using complete songs with distinct structures, consider using loops—short segments of music that can be repeated throughout your video.
Looping a 30-60 second track ensures consistency and avoids the distraction of changing melodies or lyrics.
Loops can provide a seamless and continuous musical backdrop that enhances the flow and coherence of your video.
Select music that aligns with the mood and tone you want to convey.
Upbeat and energetic music is commonly used for most YouTube videos as it tends to keep the energy high and the viewers engaged.
However, there may be instances where a more somber or intense track can be used to evoke specific emotions or create contrast.
Experiment with different music styles and genres to find the perfect fit for your videos.
It's crucial to respect copyright laws and use music that is properly licensed or royalty-free.
Using copyrighted music without permission can lead to legal issues and potential takedown of your videos.
Fortunately, there are many royalty-free music libraries available that offer a wide range of tracks that can be used in your videos without infringing on copyright.
Remember, while music can greatly enhance your videos, it's not a necessity for every video.
Some highly successful YouTube channels, like educational channels or those with a focus on dialogue, may opt for minimal or no music.
Choose what best suits your content and aligns with your creative vision.
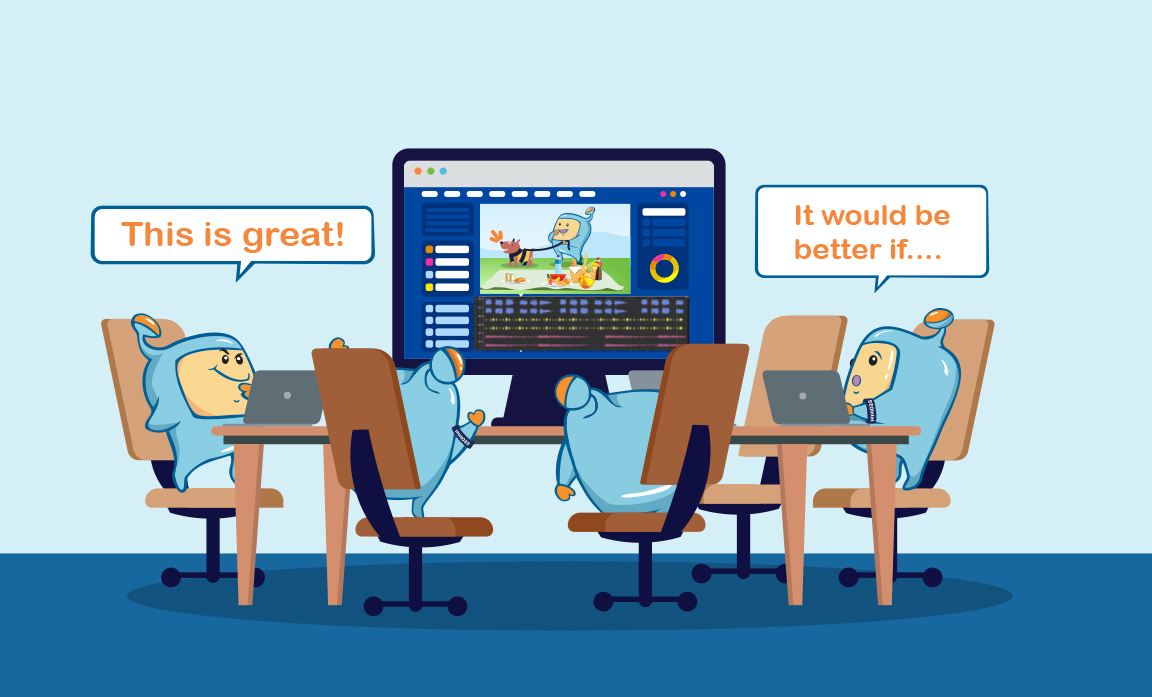
Collaborating with others and seeking feedback on your YouTube videos is a valuable process that can greatly improve the quality of your content and help you grow as a creator.
By involving others in the editing and feedback stages, you can gain fresh perspectives, identify areas for improvement, and ensure that your videos resonate with your target audience.
The Power of Collaboration:
Collaborating with others brings new ideas, insights, and expertise to your video editing process.
By working with a team or involving trusted individuals, you can benefit from diverse perspectives and skill sets that can enhance the overall quality of your videos.
Here are some key reasons why collaboration is essential:
Different individuals bring fresh ideas and approaches, helping you explore new editing techniques, storytelling methods, and visual styles.
They can share their knowledge, offer guidance on technical aspects, and help you develop your editing skills.
Dividing tasks among team members enables you to complete the project more efficiently, saving time and ensuring that all aspects of the editing process receive proper attention.
Knowing that others are involved and invested in the project can push you to strive for excellence and meet deadlines.
It also provides a support system that can help you overcome challenges and stay motivated throughout the editing process.
Gathering Feedback:
Seeking feedback is a crucial step in refining your videos and ensuring they resonate with your audience.
Constructive feedback allows you to identify strengths and weaknesses, understand how your content is perceived, and make informed decisions to improve the overall quality.

Here are some tips for effectively gathering feedback:
They should be able to provide valuable insights and objective feedback.
It can be fellow creators, trusted friends, or even members of your target audience.
This helps them provide targeted feedback on aspects such as pacing, storytelling, visual effects, audio quality, or overall engagement.
By directing their attention, you can gather more actionable feedback to guide your editing decisions.
Encourage them to provide both positive feedback and areas for improvement.
Constructive criticism helps you identify areas that need enhancement while acknowledging what is already working well.
Different individuals bring unique viewpoints, preferences, and experiences.
This diversity can help you refine your content to resonate with a broader audience and avoid potential biases.
Remember that feedback is meant to help you grow and improve. Avoid becoming defensive or dismissive of criticism.
Instead, use it as an opportunity to learn, adapt, and enhance your video editing skills.
Collaboration Tools and Platforms:
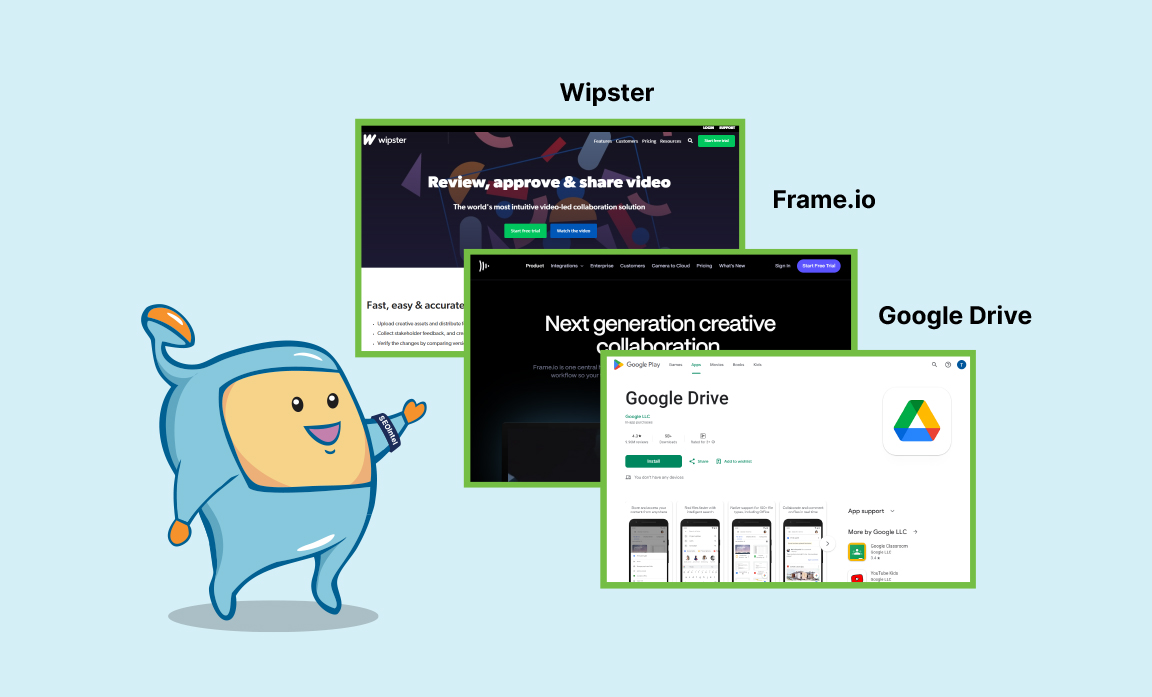
To facilitate collaboration and streamline the feedback process, consider utilizing collaboration tools and platforms designed specifically for video editing.
These tools provide a centralized space where you can upload drafts, share comments, and track changes.
Some popular collaboration platforms include:
It allows you to upload your videos, invite reviewers, and gather comments and annotations directly on the video timeline.
The platform streamlines the feedback process, making it easy to implement changes and track progress.
It enables smooth communication among team members and facilitates efficient iteration and refinement of your videos.
You can upload video drafts, share folders with reviewers, and gather feedback through comments or document annotations.
Google Docs and Sheets can also be utilized to track feedback and revisions.
These collaboration tools not only simplify the feedback process but also enhance communication, save time, and ensure that everyone involved in the editing process is on the same page.
Once you have completed the editing process and are satisfied with the final result of your YouTube video, it's time to export it in a format that is suitable for uploading to the platform.
YouTube has specific recommended settings to ensure optimal video playback and quality on its platform.
Most video editing software provides built-in export presets specifically tailored for YouTube.
These presets automatically configure the recommended settings, including resolution, aspect ratio, encoding format, bitrate, and audio settings.
Utilize these presets to simplify the exporting process and ensure that your video meets YouTube's requirements without having to manually configure each parameter.
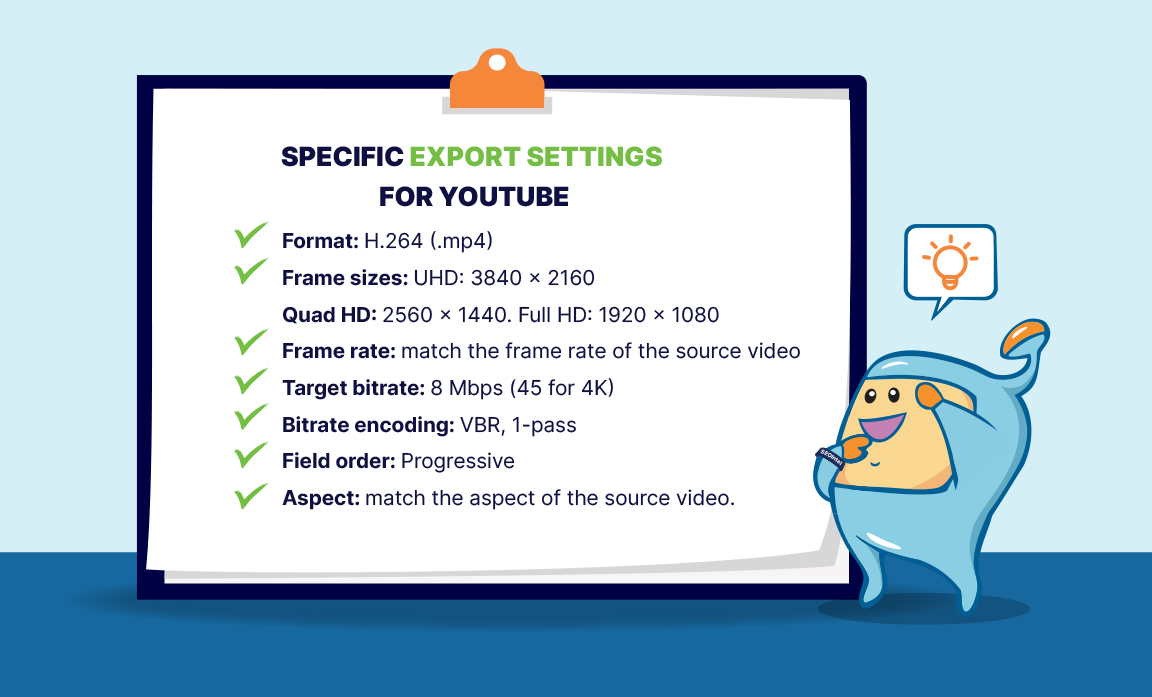
In the case there isn't a Youtube export setting, consider the following:
The recommended resolutions for YouTube videos are 720p (1280x720 pixels) and 1080p (1920x1080 pixels).
These resolutions offer a good balance between video quality and file size.
Additionally, YouTube has a standard aspect ratio of 16:9, which is the widescreen format.
Ensure that your video maintains this aspect ratio during the export process to avoid black bars or cropping issues.
This format offers a good balance between video quality and file size compression.
When exporting your video, select the H.264 format to ensure compatibility with YouTube's platform.
Another important consideration is the bitrate, which determines the quality of your video
YouTube provides recommended bitrate settings based on the resolution of your video.
Higher bitrates result in better quality but also larger file sizes.
It's important to strike a balance between quality and file size to ensure smooth playback and minimize buffering issues.
Refer to YouTube's recommended bitrate settings for different resolutions to achieve the optimal balance.
This format provides good audio quality while keeping the file size manageable.
Make sure to export your video with audio settings that align with YouTube's recommendations to ensure proper playback.
Metadata includes information such as video title, description, tags, and relevant keywords.
These details help YouTube's algorithm understand the content of your video and rank it appropriately in search results.
Take the time to optimize your video metadata to increase its visibility and reach on the platform.
Check for any visual artifacts, audio glitches, or other issues that may have occurred during the export process.
Scrutinize the video from start to finish to make sure it meets your quality standards and aligns with your creative vision.
It's essential to consider the file size of your video to avoid any upload issues.
If your video exceeds the file size limit, you may need to compress it further without compromising too much on quality.
Consider adjusting the bitrate, using video compression software, or exporting at a lower resolution to reduce the file size while maintaining acceptable video quality.
During the upload process, YouTube will automatically process the video to optimize it for streaming.
After the upload is complete, it's important to test the video by playing it on different devices and platforms to ensure that it plays smoothly and looks as intended.
This step helps you identify any potential issues that may have occurred during the upload or processing process.
By adhering to these export settings, you can ensure that your videos look great on YouTube, providing viewers with an immersive and enjoyable viewing experience.
YouTube video editing is a powerful tool for transforming raw footage into captivating content.
By employing best practices and implementing various editing techniques you can elevate the quality and impact of your videos.
Remember, practice and experimentation are key to refining your editing skills.
Continuously strive to enhance the visual appeal, storytelling, and engagement of your YouTube videos.
Before you can receive free updates, link building strategies or SEO tips you need to confirm your email right now.
(It’s easy)
Just go to your inbox, open the confirmation email from the SIA, and click the link.
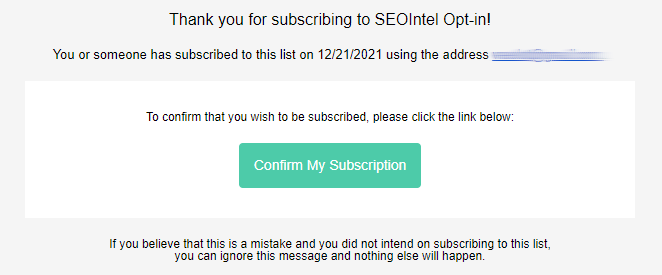
And that’s it!
PS: If you don’t see a confirmation email, please check your spam/junk or promotions folders. Sometimes the confirmation message ends up there by mistake.
Obtenez nos 7 études S.I.A. les plus controversées qui feront trembler la tête même les SEO les plus avancés d’incrédulité.
De plus, nous vous alerterons lorsque nous publierons de nouveaux tests au public.
Obtenga nuestros 7 estudios S.I.A. más controvertidos que harán que incluso el SEO más avanzado sacuda la cabeza con incredulidad.
Además, le avisaremos cuando publiquemos nuevas pruebas al público.
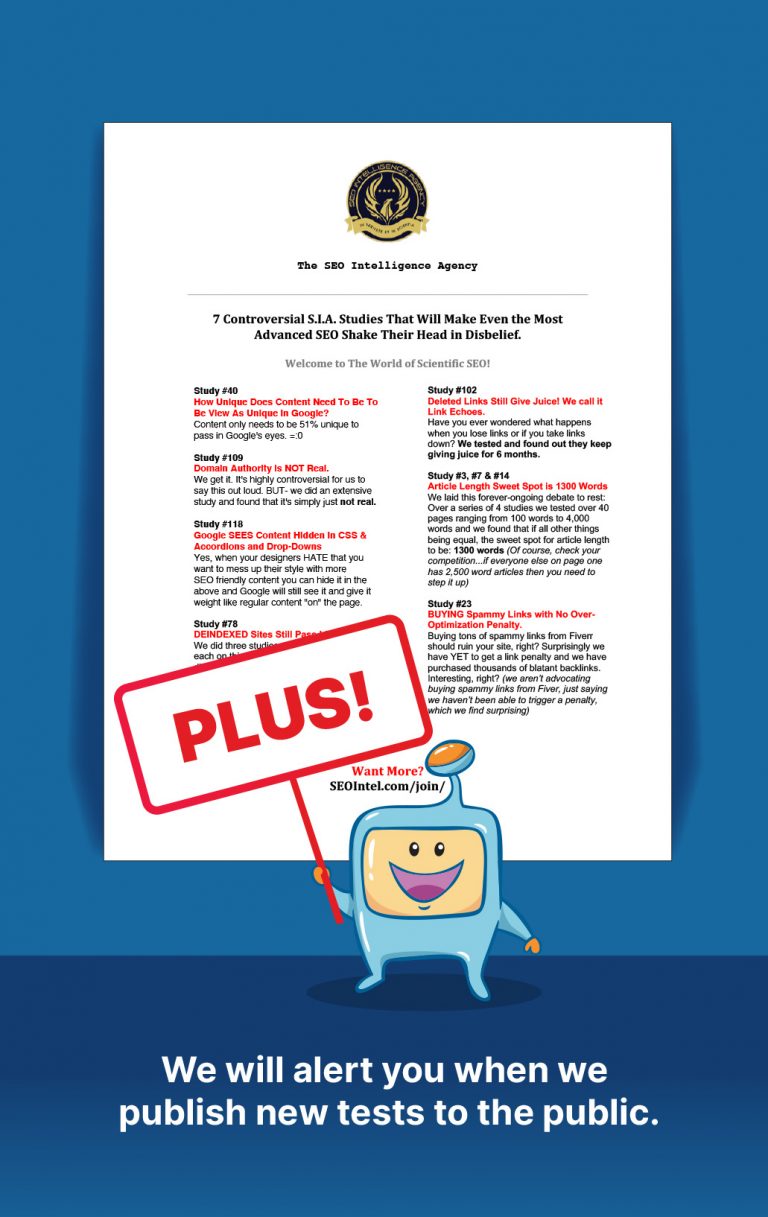
Get Our Most 7 Controversial S.I.A. Studies That Will Make Even the Most Advanced SEO Shake Their Head in Disbelief.
Plus we will alert you when we publish new tests to the public.